

Crystal decanters and stemware passed down through generations carry reminders of evenings spent at your grandparents’ house, while Thanksgiving dinners(opens in new tab) live on in the wine glasses raised around a crowded family table. You eventually have to pack away these pieces of family history, whether you’re moving somewhere new or sprucing up your home with a little redecorating. Knowing how to pack glassware extends the life of your pieces beyond those cherished moments and keeps every item intact from the first box to the last.
Even when there’s no move on the calendar, your glassware may need a home outside the kitchen cabinets for a while. From heirloom collections saved for future generations to holiday pieces waiting for their next turn at the dinner table, learning how to store glassware safely can help make sure the next time you unwrap it, everything looks just as you remember.
Before you pack, give your glassware a once-over
There’s always one glass at the back of the cabinet that hasn’t seen daylight since your last big family gathering, sitting beside a few mismatched survivors from sets that used to have six. As part of your moving day checklist(opens in new tab), take a moment to sort what’s staying in the family from what’s ready for departure.
Before you start wrapping, pull everything out where you can see it and make a little room on the table for the sorting session ahead.
- Figure out what you’re bringing along: Lay out your glasses by collection, counting how many remain from each set while separating everyday drinkware from the crystal reserved for special occasions.
- Look for damage before it travels with you: Hold each item toward a light source and turn it slowly, watching for hairline cracks along the body or tiny chips around the rim. Set damaged glass aside, since pressure from neighboring items can worsen an existing fracture during transport.
- Wash away the evidence of past dinners: A glass that’s been sitting untouched for months can collect dust or develop a film, so clean ordinary drinkware with mild dish soap and lukewarm water before setting it out to dry. For antique crystal or hand-painted designs, follow the appropriate care instructions rather than assuming everything belongs in the sink.
- Give yourself room to work: Cover a sturdy table with a clean towel, then arrange your wrapping supplies along one side while leaving the other free for finished bundles. This way, you’re less likely to knock over an unwrapped glass while reaching across the table for another sheet of paper.
- Document anything you’d hate to lose: Photograph inherited collections and family heirlooms(opens in new tab) before packing, capturing identifying marks or existing imperfections that might be useful for insurance purposes. Keep a written inventory alongside those pictures so you can check the contents against your records once everything reaches its destination.
Gather your glassware packing supplies
Stock up on packing paper before you start wrapping Grandma’s crystal, so moving day stays on schedule.
- Double-walled or dish-pack boxes
- Unprinted packing paper
- Bubble wrap
- Cardboard cell dividers
- Foam sheets or sleeves
- Strong packing tape
- Fragile labels and a marker
Start with sturdy, double-walled cardboard boxes that can handle the weight of your collection without buckling under it.
Those enormous cartons left over from your latest online shopping spree might look irresistible, but smaller boxes hold heavy glassware better, since you lift them more easily and put less strain on the bottom of the carton. For fragile collections, dish-pack boxes have reinforced walls and offer additional protection during transport.
Unprinted packing paper is a good place to start when choosing wrapping materials, as it provides a clean barrier against the glass without leaving ink stains behind. Newspaper can still serve as outer cushioning, although its ink may transfer onto surfaces when used directly against them.
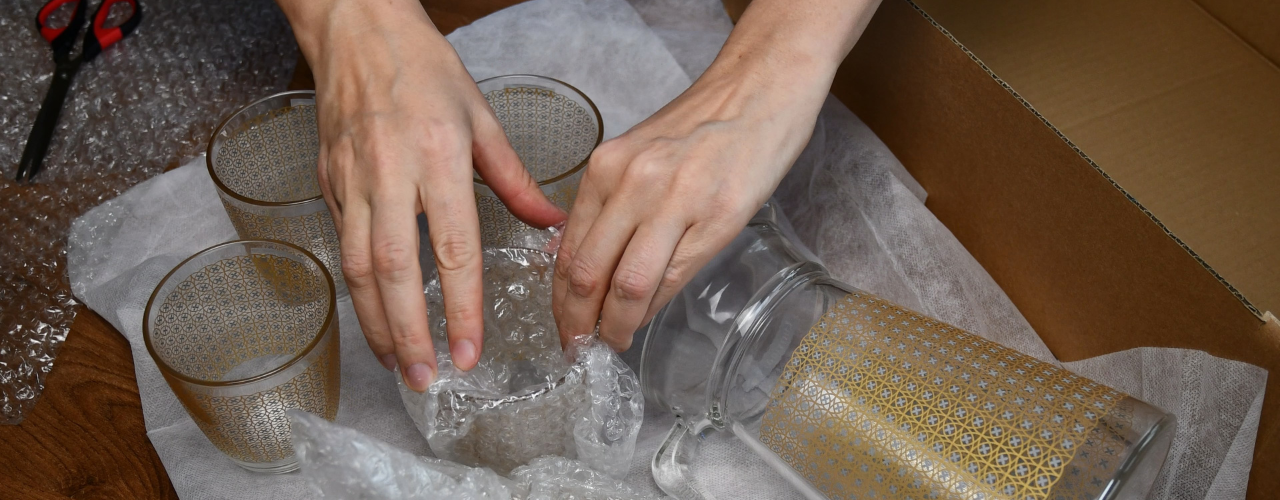
Bubble wrap offers another layer of protection for delicate pieces, with the bubbles facing inward over an initial layer of paper to prevent marks on painted or decorated glass.
Before spending money on specialty inserts, ask a local retailer for sturdy boxes with built-in dividers that fit standard drinking glasses.
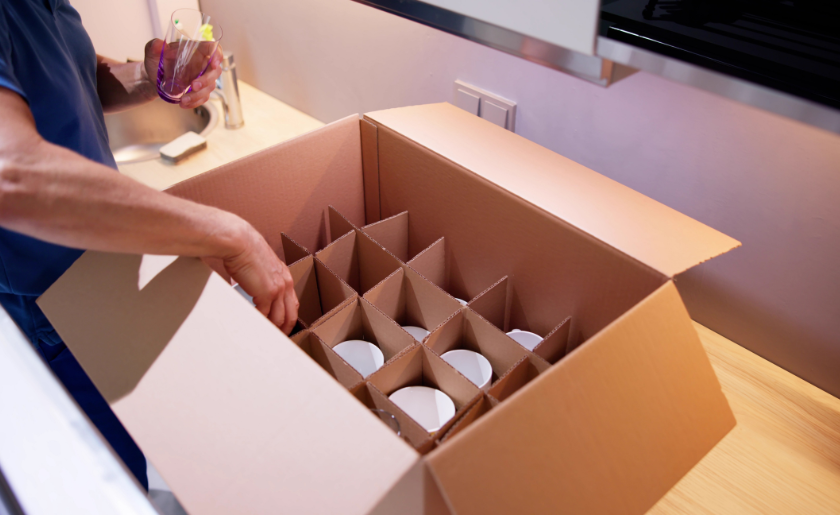
Slender stems and unusually shaped rims can make certain pieces of glassware trickier to protect during a move. Foam sheets can cushion vulnerable areas, while premade sleeves may work for individual glasses if they fit without squeezing the bowl or stem.
For a budget-friendly alternative, clean bath towels and can help wrap sturdier drinkware during a short move, provided the fabric doesn’t pull tightly against delicate edges.
Reinforce the bottom seam of each carton with strong packing tape before sealing anything and add extra strips across the base to support its contents. Once you fill a box, label the sides with the destination room and a description of what’s inside, then add a visible FRAGILE marking to remind anyone handling it to take care.
How to pack glassware for moving, step by step
With the kitchen table covered in wrapping supplies, you can tackle the glasses waiting their turn. Start with the sturdier ones you use for morning orange juice, leaving the family crystal for when you’ve gotten into the swing of things. Give yourself enough time to wrap each item separately. Taking your time with each piece protects years of careful handling.
Step 1: Build a cushioned base inside the box
Before placing anything inside, line the bottom of your carton with several inches of crumpled packing paper or a fitted foam pad. Make sure the padding extends into the corners, where a hard impact can travel through the cardboard and reach the contents. A flat sheet of paper alone won’t absorb much of a jolt, so the base needs enough volume to soften the movement of the box during transport.
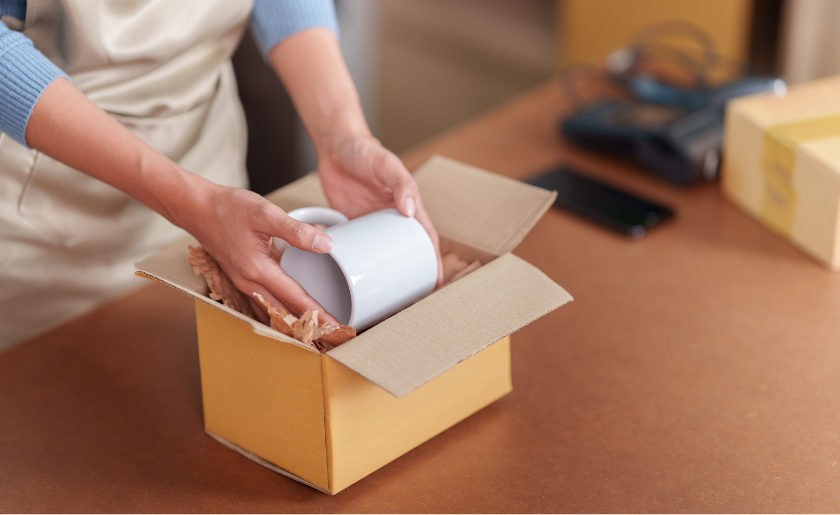
Step 2: Wrap each glass from the inside out
Lay a sheet of unprinted packing paper across your work surface and place the glass near one corner. Tuck a small amount of loosely crumpled paper into the bowl to support its hollow interior, taking care not to force it against thin walls.
Roll the glass across the sheet while folding the excess paper over the opening, then add another layer if the outline of the item still feels exposed. For stemware, support the stem separately with a folded strip of paper before wrapping the entire glass.
Step 3: Arrange the wrapped pieces without crowding
Set drinking glasses upright inside the prepared carton, using cardboard dividers whenever their dimensions allow. Keep heavier items toward the bottom and reserve the upper portion for lighter ones, making sure no glass rests directly against another. If you’re packing a mixed collection, use a separate box for fragile crystal rather than squeezing it between everyday tumblers.
Step 4: Fill the spaces that allow movement
Once everything is arranged, tuck crumpled paper into the gaps around each bundle and along the box walls. The contents should feel supported without being wedged so tightly that pressure builds against the rims. Add a final cushion above the top layer, leaving enough clearance for the lid to close without pressing down on the glasses.
Step 5: Check the box before sealing it
Close the flaps and rock the carton slowly from side to side while holding it securely on a table. Any rattling or shifting means there’s room for another bit of cushioning, so reopen it and adjust the filling before applying tape. Finish by marking the carton THIS SIDE UP, then place it somewhere it won’t end up underneath heavier moving boxes.
How to pack different types of glassware
Delicate stemware and thick everyday tumblers need different packing methods. Each has its own weak spots, and a little attention to their shape can spare you an unpleasant surprise when the wrapping comes off.
Wine glasses and delicate stemware
Slender stems are often the first casualties of a poorly packed box, so give them more support before wrapping the rest of the glass. Fold a narrow strip of packing paper around each stem without pulling it tight, then wrap the entire piece in another sheet, allowing enough material to cushion the bowl.
For a collection of fine crystal, individual cardboard compartments can prevent neighboring glasses from colliding, although the dividers need to be tall enough to separate the bowls as well as the stems.
If you’re moving a large collection of wine glasses, consider renting the plastic glass racks used by catering companies.
Their individual compartments can accommodate dozens of glasses, and the rigid frame makes carrying them less nerve-racking than juggling multiple cardboard boxes. Check the compartment dimensions before loading hand-blown stemware, since oversized bowls may sit too close together.
Mugs and glass cups with handles
A mug handle might survive years of morning coffee only to snap off during one bumpy ride in the moving truck. To protect that vulnerable curve, cut a pool noodle to roughly the height of the handle, make a lengthwise slit and fit it around the exposed section without forcing it into place. Wrap the entire mug in packing paper afterward, adding cushioning around the handle so it doesn’t bear the weight of neighboring items.
For a shorter move, thick socks can also serve as protective sleeves for sturdy cups. Slide each one into a clean sock, fold any excess fabric over the opening and place it in a divided carton with padding between the compartments.
Glass bowls and serving platters
A holiday serving platter may have made it through decades of family dinners, but its broad rim can chip when it presses against the side of a moving box. Slit foam tubing lengthwise and fit it around the perimeter to shield the edge, checking that the material sits securely without applying pressure.
Shallow glass dishes and platters should be wrapped individually. Pack flat platters on their edges in a padded dish box when their shape and condition permit, rather than stacking them horizontally beneath heavier dishes.
Decanters and glassware with removable parts
Remove the stopper from decanters before packing to prevent damage during transport, using enough paper to protect the narrow end from pressure. The decanter itself needs cushioning around its neck, with additional support inside the carton to stop it from tipping.
The same approach applies to glass jars with removable lids. For jars with metal clamp closures, release the tension before storage or transport so the hardware doesn’t place unnecessary stress on the glass as temperatures change.
How to pack glassware for shipping
Once a package leaves your doorstep, it passes through several sorting facilities and shares a delivery truck with many other parcels. A vintage vase picked up at an estate sale could travel hundreds of miles before reaching its new owner, facing its fair share of rough handling along the way. Shipping glassware calls for a sturdier setup than you’d use when carrying boxes from your kitchen to a moving van.
Double-boxing gives fragile shipments a better chance of surviving the journey. After securing the glassware in its own carton, choose a second box large enough to leave roughly two to three inches of clearance around the smaller one. Fill that space with dense cushioning that won’t collapse under the weight of neighboring packages, making sure the inner carton remains suspended away from the exterior walls. For additional support beneath it, a fitted piece of corrugated cardboard can act as a false floor, helping distribute the force of an impact across a wider surface.

Loose packing peanuts can shift around during transit, sometimes allowing heavier contents to settle against the bottom of a parcel. Containing them in tied plastic bags makes them easier to manage, although they still need to be packed firmly enough to prevent the smaller carton from drifting out of position. Inflatable air pillows present another concern, as a single puncture can deflate the cushioning around your shipment, leaving the contents exposed to whatever happens next.
Before closing the outer carton, examine the spacing around the inner package from every angle. If the protective material has settled or left an opening near the corners, build up those areas until the smaller box stays centered when the parcel is repositioned. Reinforce the exterior seams with shipping-grade tape, paying attention to the edges most likely to split under pressure.
For expensive crystal or antique pieces, document the packing process as carefully as the item itself. Take pictures showing the protective layers inside each carton, then save them with your proof of postage in case the shipment arrives damaged.
Carriers may reject claims when packaging falls short of their requirements, so check the applicable terms before sending anything irreplaceable.
How to store glassware safely in a self storage unit
Your glassware may be displaced for weeks by a kitchen renovation or squeezed out by downsizing to a smaller space(opens in new tab) with fewer cabinets. Renting a self storage unit(opens in new tab) buys you time to figure out where everything belongs without making hasty decisions about what to give away. Since those boxes could remain sealed beyond your original plans, it’s worth setting them up for a longer stay from the outset.
Start by considering the environment your collection will be sitting in. Climate-controlled self storage(opens in new tab) can help protect older crystal and antique glass from prolonged humidity and temperature changes, which may contribute to surface deterioration in certain glass compositions. A cloudy coating or persistent oily film can sometimes indicate glass disease, a condition affecting chemically unstable glass. If you’re preserving rare or valuable pieces, monitoring humidity with a hygrometer is a sensible precaution.
Back at the unit, shelving can spare your cartons from direct contact with concrete and make it easier to retrieve a set without rearranging everything else. Arrange drinking glasses with their openings facing upward rather than balancing them on their rims and leave nested stacks out of the equation to prevent pieces from becoming stuck together. For serving bowls that need to share a container, slip a protective sheet between each one and limit the height of the stack.
Before locking up, check that every vessel is dry, including the hard-to-reach areas around handles. Store decanter stoppers apart from their bottles and leave metal-clasp jars unfastened to avoid sustained pressure around the neck. If you’re planning to leave the collection untouched for an extended period, schedule occasional visits to look for condensation or changes in the glass surface.
Once you’re ready to bring everything back home, give cold items time to warm up naturally before washing them. Glass that’s spent the winter in an unheated unit can be vulnerable to abrupt temperature shifts, so let it adjust indoors before putting the kettle on or filling the sink with hot water.
FAQ
Is it better to store glasses upright or upside down?
Upright is the safer choice for cabinet storage. The rim is the thinnest, weakest part of a glass, while the base is built to carry weight, so resting a glass on its rim risks chips over time. The tradeoff is that dust can settle inside, so give glasses that haven’t been used in a while a quick rinse before pouring. Leave a little space between pieces so the bases don’t bump neighboring rims.
Can I store glassware in a garage, attic or basement?
It’s best to avoid these spaces. Garages and attics can get extremely hot in summer and drop below freezing in winter and the swings between damp and dry air put stress on glass. Basements add moisture to the mix. A closet or cabinet inside the main living area, where temperature and humidity stay steadier, is a better choice. If you must use a storage unit, choose a climate-controlled one.
Why do my glasses smell musty after being stored in a cabinet?
Wooden cabinets, especially new or damp ones, can hold odors that transfer to glassware. Silica gel packets(opens in new tab) can help here, since a few tucked into the cabinet will draw out excess moisture. Storing glasses upright also keeps the rim off the shelf. If a glass still smells off, let it air out for 10 to 15 minutes before using it, or give it a quick wash.
Why do my stored glasses look cloudy or feel greasy, and can I fix it?
A hazy or slippery film often comes from moisture reacting with the glass surface, and it’s more likely in damp conditions. If it’s a surface deposit, soaking the glass overnight in white vinegar and gently brushing it can help. Glass with a fine network of tiny cracks is showing deeper deterioration that cleaning won’t reverse, so move it somewhere drier to protect the rest of your collection. Valuable or antique pieces are worth showing to a conservator before you try any cleaning.
How do I separate glasses that got stuck together in storage?
Nested glasses can lock together from suction, or because one was still warm when it went into the stack. To release them, fill the inner glass with ice water and set the outer glass in a few inches of warm water, then twist gently after a minute or two. Stick with warm tap water at room temperature, since sudden temperature changes can crack glass. To prevent this, let washed glasses cool completely and store them upright instead of nested.
A glass act from start to finish
The next time you’re setting the table for Christmas and trying dishes from around the world(opens in new tab) or reaching for the good glasses to celebrate a milestone, those extra minutes spent wrapping everything pay off. Whether your collection has traveled across state lines or spent a few seasons in storage, careful handling gives it more chances to be part of the memories still to come.
Here’s to raising a glass without having to pick up the pieces!


How to Pack Glassware Without Breaking a Sweat (or a Glass)
Crystal decanters and stemware passed down through generations carry reminders of evenings spent at your grandparents’ house, while Thanksgiving dinners(opens in new tab) live on in the wine glasses raised around a crowded family table. You eventually have to pack away these pieces of family history, whether you’re moving somewhere new or sprucing up your home with a little redecorating. Knowing how to pack glassware extends the life of your pieces beyond those cherished moments and keeps every item intact from the first box to the last.

Best Storage Facilities in NYC, Based on Customer Reviews
Most storage listings in New York City look the same. Reviews are where you find out what you’re getting into: whether the staff will help you, whether the building stays clean and whether your rent stays put once you’ve moved in. So we went through renters’ reviews and picked the three best storage facilities in each NYC borough. Each one gets a score out of 100, and each brand shows up only once per borough. If you’re curious how we scored them, that’s at the end.
Packing Services: Costs, Pros, Cons & Alternatives
Professional packers save time and reduce breakage, but they add a real cost to your move. Whether they’re worth it depends on how much you own, how much protection it needs and how much time you have. This guide covers what packing services cost, when they pay off, when they don’t and the cheaper alternatives worth considering.
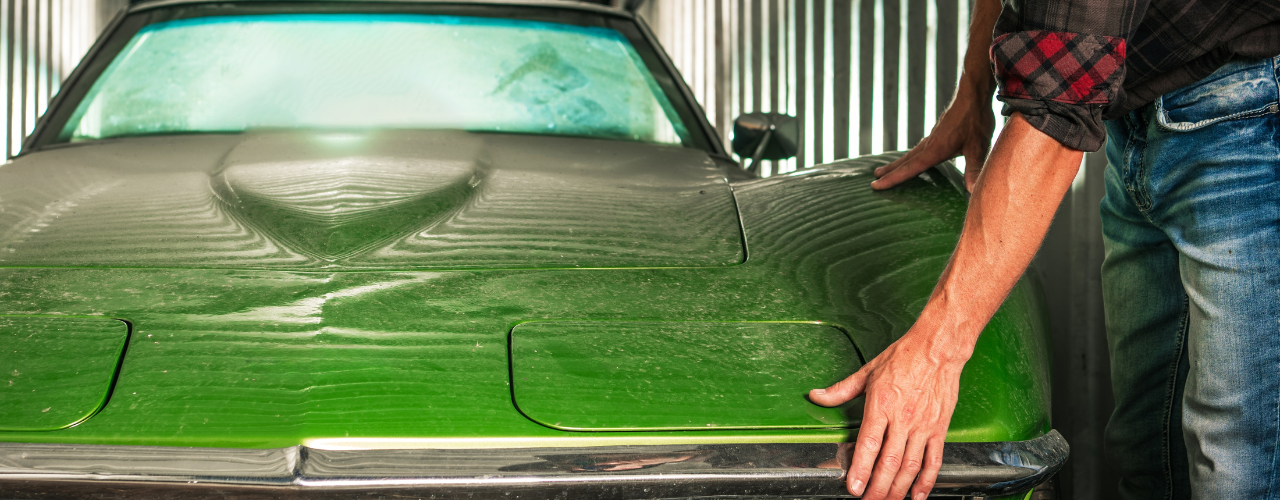
Classic Car Storage: A Guide to Protecting Your Collector Car
Any classic car you see is still there and looking great because people throughout the years knew how to store it well. Those smart decisions kept it from being damaged by moisture, frost and other issues that lead other cars to the auto-graveyard. Now, it’s up to you to carry on the legacy by choosing the right kind of classic car storage(opens in new tab). This guide compares indoor and outdoor options, explains why climate control storage(opens in new tab) is important and shows you how to prepare your car before you store it.(opens in new tab)

Second Acts With Roll-Up Doors: The Most Unexpected Self Storage Conversions In The U.S.
You probably don’t expect to stash your holiday decorations in a former armory. Or tuck away old photo albums where moviegoers once lined up for popcorn. But across the country, some of the most unexpected buildings are getting a second act — as self storage facilities.
Storage Unit Insurance: Your Coverage Options Compared
Your homeowners or renters policy may already cover your stored belongings, but likely not for their full value or against every risk. This guide explains where coverage comes from, what each option leaves out and how to decide whether you need more from your storage unit insurance.

I’m Gen Z: What’s in My Storage Unit?
Trading Facebook posts for TikTok dances and Beanie Babies for Labubus, Gen Z has given growing up online a whole new meaning. Defined by everything concerning reusing, recycling and cycling through trends that previous generations would rather forget (looking at you, Millennials and capri jeans), it’s no wonder this is also a generation that can spot an authentic vintage find from a fast-fashion knockoff in under three seconds. And when your wardrobe can go from Depop find to next season’s comeback without warning, a little extra space starts making sense.
I’m a Millennial: What’s in My Storage Unit?
So, you’re a Millennial. You probably know all the lyrics to Phoebe Buffay’s Smelly Cat. Hannah Montana’s The Best of Both Worlds has become more like a life philosophy rather than a fun tune. And if you rent a self storage unit, you’re in good company. You’ve officially joined the 31% of Millennials who rent storage space, most often because there simply isn’t enough room at home, according to StorageCafe’s 2026 Self Storage Demand and Trends survey(opens in new tab).

Attic Storage Done Right: What’s Worth Keeping Up Top?
The attic is one of those places where holiday decorations end up next to a forgotten suitcase, a broken lamp and boxes nobody’s opened since moving day. Out of sight, out of mind works well enough until you need something from the back or realize you’ve been adding weight to a floor you know little about.