

Key Takeaways
- Clean and dry the snowmobile thoroughly to remove dirt, salt, and moisture that can cause corrosion and rust.
- Protect the engine and fuel system by changing the oil, fogging the engine, and treating the fuel with stabilizer before storage.
- Lubricate and inspect key components including the chain-case, suspension, drivetrain, brakes, clutches, and other moving parts.
- Maintain the battery and prevent pest damage by storing the battery properly and sealing openings to keep rodents from damaging wiring and insulation.
- Store the snowmobile in a dry, protected space using a lift and breathable cover when appropriate, while keeping it elevated and protected from moisture, pests, and UV exposure.
When it comes to how to store your snowmobile, it’s important to go through all the motions. You’ve likely put a lot into it, so the last thing you want is damage from rust, corrosion, or engine wear just because of improper storage. To help you avoid that, we’ve pulled together a few practical tips to keep your snowmobile in top shape when it’s not in use.
1. Clean your snowmobile thoroughly
Before putting your snowmobile away, remove built-up dirt, mud and salt that can cause corrosion. You can use mild soap and warm water to clean the seat, hood and panels. Afterward, spray a degreaser under the hood and near the oil reservoir, then rinse thoroughly. Finally, dry all components completely to prevent rust formation. For added protection, consider applying a finishing wax or silicone-based product to maintain the sled’s exterior.
2. Change the oil
The issue with used oil is that it contains contaminants that can lead to internal corrosion. So, drain the old oil and replace it with high-quality synthetic oil. Also, install a new oil filter to ensure a fresh start for the next season. That’s how you store your snowmobile without engine wear.
3. Fog your snowmobile’s engine
To protect internal engine components from moisture and corrosion, coat them with fogging oil. If your sled has an automatic fogging system, follow the manufacturer’s instructions. Otherwise, remove the spark plugs, spray fogging oil into each cylinder, and turn the engine over by hand to distribute the oil evenly. This protective barrier prevents rust and keeps engine parts lubricated during storage.
4. Treat and stabilize the fuel
Don’t drain the gas tank and leave it empty, as this can dry out the seals. But don’t leave the fuel untreated either, since it will evaporate and corrode the carburetor along with other parts of the engine. Instead, fill the tank and add a fuel stabilizer, which will reduce the solvent’s evaporation. Make sure you use the right amount of stabilizer by consulting the manufacturer’s instructions. Then, run the engine for a few minutes to make sure the treated fuel circulates throughout the snowmobile, and drain any extra gas from the tank.
5. Check and change the chaincase oil
Check the owner’s manual to see the service interval and change the chaincase oil if it’s past due. You should also inspect the chaincase oil for metal particles or a milky appearance, which indicates water contamination. Change the oil using a formula specifically designed for snowmobiles so that your vehicle is properly lubricated and its drivetrain components keep their longevity.

The engine of a snowmobile
6. Lubricate the snowmobile’s moving parts and chassis
Lubrication prevents rust and ensures smooth operation when your sled is back in action. So, grease all suspension and drivetrain components, including the fittings, to push out dirt and moisture. Additionally, apply a light coating of lubricant, such as WD-40, to exposed metal parts like the frame and suspension to prevent rust. Be careful not to spray belts or rubber components. Apply with a grease gun, pumping until fresh grease appears and old/dirty grease is pushed out. This flushes out moisture and dirt, ensuring parts are well-protected during storage and ready for next season.
However, you should never use WD-40 as a replacement for proper grease on suspension or steering fittings, track slides, or other high-load pivot points. Instead, use a high-quality lithium-based chassis grease or synthetic snowmobile grease for all grease zerks (fittings) on:
- Suspension arms and linkages
- Steering pivots and bushings
- Skid-frame and rear suspension components
Apply with a grease gun, pumping until fresh grease appears and old/dirty grease is pushed out. This flushes out moisture and dirt, ensuring parts are well-protected during storage and ready for next season. Finally, wipe away any excess to avoid attracting dirt and debris.
7. Maintain the battery
Leaving the battery in the snowmobile during the offseason can cause it to drain completely and thus shorten its lifespan. To keep it in good condition:
- Remove the battery and store it in a cool, dry place off the ground.
- Use a trickle charger or battery maintainer to keep it charged throughout the summer.
8. Inspect your snowmobile’s brake system
Check the brake pads, hoses, and fluid levels for any signs of wear or leaks. If you notice cracks, thinning pads or low fluid levels, replace the components before winter arrives. Proper brake maintenance ensures safe and reliable operation when it’s time to ride again.

Inspecting the components of a snowmobile.
9. Prevent rodent and pest damage
If you’re planning on storing your sled in a shed or a garage, you should know that rodents love nesting in stored snowmobiles, often chewing on wiring and insulation. To deter pests:
- Plug the exhaust and air intake openings with steel wool to keep mice and small critters out.
- Place mothballs or dryer sheets around the sled and inside storage compartments to discourage nesting.
- Store your sled in a rodent-free environment whenever possible.
10. Give your snowmobile proper storage
To protect your snowmobile from the elements, you need to find the most appropriate storage space:
- Indoor Storage: Ideally, store your sled in a dry, climate-controlled garage or shed.
- Outdoor Storage: If indoor space is unavailable, use a high-quality, breathable cover. Elevate the sled on pallets or a stand to keep it off the ground. Consider adding a tarp over the cover for extra protection, but leave space for proper ventilation to prevent moisture or mildew buildup.
- Self Storage: If space is limited, renting a climate-controlled storage unit is an excellent alternative for year-round protection. In terms of size, a 10’x30’ storage unit will likely be enough, but you can use our storage unit size calculator to make sure!
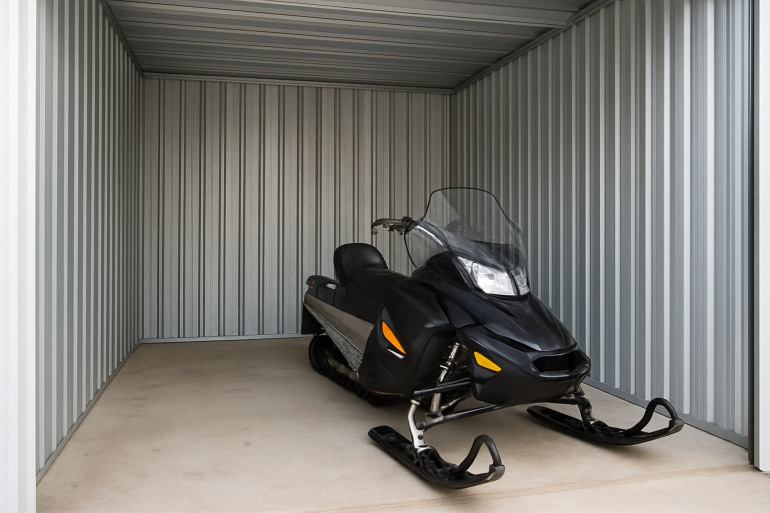
Snowmobile in a self storage unit. Visual created with the help of generative AI tools
11. Use a snowmobile storage lift
When your sled stays parked all season, the pressure on the suspension and track can lead to worn-out springs and flat spots. A snowmobile lift holds the machine up by the frame, so the track and skis hang loose. It also helps keep moisture away from the underside and prevents the track from sticking to the floor, especially if you’re storing it somewhere cold or damp.
How to use a snowmobile lift
- Using a lift is simple, but you still want to do it right:
- Make sure the ground is level so the sled stays balanced.
- Line up the lift with the sled’s frame (not the track or skis).
- Slowly raise it until the sled is off the ground (just enough so the track and skis aren’t touching).
- Once it’s up, give it a small shake to check that it’s stable. Adjust if needed.
If you’re storing the sled in a storage unit, make sure there’s room for the lift. A 10’x10’ storage unit usually works fine. And if the lift has wheels, use blocks or chocks so it can’t roll.
12. Cover your snowmobile
A well-fitted, breathable cover protects against dust, debris and moisture. Even if stored indoors, a cover prevents dust buildup and deters pests. Avoid nonbreathable plastic covers that can trap moisture and lead to mold or mildew.
13. Protect plastics and vinyl
When you think of how to store your snowmobile outside, you might believe that covering it is all that matters. But here’s an extra layer of protection for your sled’s plastics and vinyl components: Just apply a silicone spray to the hood, dash, seat and other plastic parts. That’s how you prevent drying, cracking and fading due to UV exposure.
Snowmobile Storage FAQ
1. What should you do with the drive belt before storing your snowmobile?
Take the drive belt off before putting your sled in storage. This helps prevent flat spots and keeps it from sticking to the clutches.
Store the belt flat or hanging, in a dry place away from sunlight or chemicals. When it’s time to ride again, just put it back on.
2. Should I start my snowmobile during the offseason?
No, it’s best not to. Starting it while in storage can cause condensation to build up inside the engine, especially if it’s moved in and out of cold spaces. Focus instead on proper prep before storage. Some owners do fire it up every few weeks, but only if it’s been fogged and fully winterized.
3. What’s the best place to store my sled if I don’t have indoor space?
Ideally, rent a climate-controlled or indoor storage unit, or team up with a friend to split the cost. Avoid anywhere with humidity, standing water, or full sun. Those conditions break down rubber, plastic, and seals fast.
4. Do I need to maintain the clutch before storing my sled?
Yes, if you can. Clean both the primary and secondary clutches, check for wear, and lightly lubricate. It prevents sticking and helps everything run smooth come next season.
5. How can I prevent moisture and mold in a trailer or shed?
Ventilation is key. Crack a vent or leave zippers slightly open. Use moisture absorbers like DampRid and check them regularly. And don’t park on grass. Instead, use pavement or elevate the sled on pallets to keep ground moisture away.
Conclusion
Now knowing how to store your snowmobile correctly can result in unnecessary repairs and maintenance issues. Follow these steps, and you’ll extend the lifespan of your machine, prevent costly damages and ensure a hassle-free start to the next winter season. And while you’re at it, you can consult our outdoor gear storage guide, too!



Scary Good DIY Halloween Decorations That Won’t Haunt Your Wallet
A few floating candles in the hallway, a family of ghosts by the front door and a suspicious number of bats climbing up the bedroom wall can make October feel a whole lot spookier. While Halloween stores are full of tempting finds, some of the best DIY Halloween decorations can come from things you already have tucked away in drawers, closets or the recycling bin.

Suburban Giants and Urban Risers: Where America’s 100 Largest Metros Fall on the Self Storage Map
Self storage has long been a suburban story. Across America largest 100 metros, 59% of the inventory built over the past decade sits outside city cores, largely preserving the ratio of the total existing inventory.

Sweatshirt Storage Ideas Worth Keeping Up Your Sleeve
Sweatshirts are great until you realize how much room they take up. A few thick hoodies can fill a drawer fast, with lighter crewnecks getting squashed underneath or pushed somewhere you forget about. Good sweatshirt storage can make that pile much easier to manage without requiring a bigger closet.

Living Room Storage Ideas: 28 Ways to Reclaim Your Hosting Space
If a living room is where most of a household’s living happens, good storage should be the top priority for setting up or revamping the place. After all, think of how easier it would be to have people over when tidying up the place is just a matter of putting things in their right place (in a time when fewer and fewer people are entertaining friends at home(opens in new tab)). The trick is making room for all those wayward clothes, blankets, chargers and other small things that end up on (or, inexplicably, in) the sofa. Here are 28 living room storage ideas to get you started and make tidying up a quick affair.

25 Mudroom Storage Ideas (And Mistakes to Avoid)
When you come home with muddy boots, an armful of bags and a coat you can’t wait to take off, it’s nice to have somewhere to put it all. With a mudroom, you can leave the outdoor mess at the door instead of carrying it through the house. Traditionally, you’d set aside a separate room, but you can just as easily use a hallway, an entryway closet, a laundry-room corner or a stretch of wall near the entrance.

Is Your Home Office Worth the Rent? What Coworking and Self Storage Could Save You
Every square foot of your apartment comes with a price tag, and a home office claims more of them than most renters expect. It starts with a desk. Then come the second monitor, the printer, the filing cabinet and the overflow boxes. Before long, the corner you set aside for work has turned into a small room you are paying for every month.

Best U.S. Cities to Live Uncluttered: Plano, TX, Offers the Most Room to Breathe
Clutter is in our homes as much as in our heads. Both are shaped by where we live.

America’s Top Snowbird Destinations for 2026–2027: Florida Leads in Numbers, Texas Wins on Value
For Americans living in colder states, the approach of winter is reason enough to start looking south. Cold weather carries costs that go beyond the heating bill and shoveling snow. Seasonal affective disorder(opens in new tab) is far more prevalent in northern states, so a temporary move south isn’t simply an escape from the cold, but a chance to spend the hardest stretch of winter outdoors and in the sun.

How Much Does Halloween Really Cost in 2026? Plan Wisely to Avoid the Scare of Hidden Costs
Americans’ love for Halloween is almost frightening — this year alone, we are on our way to spending $13.5 billion, according to data from the National Retail Federation(opens in new tab). That breaks down to about $115 Halloween costs per person, a whopping 49% more than 10 years ago.