

Key Takeaways
- Group garden tools by task (planting, watering, digging, etc.) and assign each group a dedicated spot for quick access.
- Label shelves and bins before filling them to create a visual map and make it easier for everyone to return tools to the right place.
- Use vertical space with pegboards, rails, or hooks to keep tools visible, off the floor, and easy to grab, placing heavier items lower and lighter ones higher.
- Give long-handled tools a dedicated “parking spot” (rack, wall hooks, or a bucket with a strap) to prevent them from falling or tangling.
- Separate everyday tools (trowel, pruners, gloves) into a portable “go kit” and store seasonal or rarely used items in labeled bins or a storage unit.
Garden tools feel effortless to manage when everything has a clear place and a simple routine. These garden tool storage ideas focus on layouts and habits you can use in a shed, garage, or outdoor cabinet and, when you need extra room, in a storage unit(opens in new tab) as a seasonal “overflow closet.” That way, you always know exactly where you can find each tool.
If you’re still new to gardening overall, pair these ideas with a step‑by‑step guide to DIY urban gardening(opens in new tab) so you’re setting up storage and planting plans at the same time.
1. Think your storage space around “zones”
Instead of jumping straight into what storage items you could buy, start with the space you already have. Look at your shed, garage wall, balcony corner, or cabinet and divide it into simple “zones.” The easiest way is to group tools by the job they do: planting and prep, watering and care, heavy digging and cleanup, plus power and safety (like trimmers and gloves).
Once those groups are clear, give each one its own spot: a section of wall, one shelf, or one bin. At home, you might dedicate one side of the shed or outdoor storage cabinet to long handled tools and another to pots and soil. If you use a storage room for the overflow, you can copy the same idea vertically: one rack or one shelf for each zone, clearly labelled so you can walk in, grab what you need, and head back to the garden.
2. Label first, then fill
Labels turn shelves and bins into a simple map. A helpful habit is to label areas before you fill them: Choose names that match how you think, such as “watering,” “soil and fertilizer,” “plant care,” “decor,” and “tools.” Put these labels directly on bins, shelves, or doors.
Once the names are in place, every item has a clear destination. At home, this makes it natural to return things to the right spot. If you share tools with family or neighbors, labels also make it safer and easier for everyone to put things back.
3. Make a vertical tool wall you can reuse anywhere
You do not need to be handy to create a simple vertical tool wall. The easiest version is to just use a ready made pegboard or rail with hooks that you screw into the wall, then hang tools from it. Hanging tools on the wall keeps them visible, off the floor, and easy to grab.
In a shed or garage, find the strong wooden “bones” inside the wall (the studs) and screw the pegboard or rail into those spots. Start the storage area low, around knee height, and go up to just above eye level so you can reach everything without stretching. Use sturdy hooks and don’t overload them: keep heavier items on the lower hooks instead and lighter pieces higher up.
4. Give long handled tools a “parking spot”
Long handled tools (rakes, shovels, hoes, brooms) are awkward and love to fall into a pile. A very simple fix is to give them a clear “parking spot” in one corner or along one wall. For a no tools option, you can stand them in a big bucket or heavy planter and use a strap or bungee around the handles to keep them together.
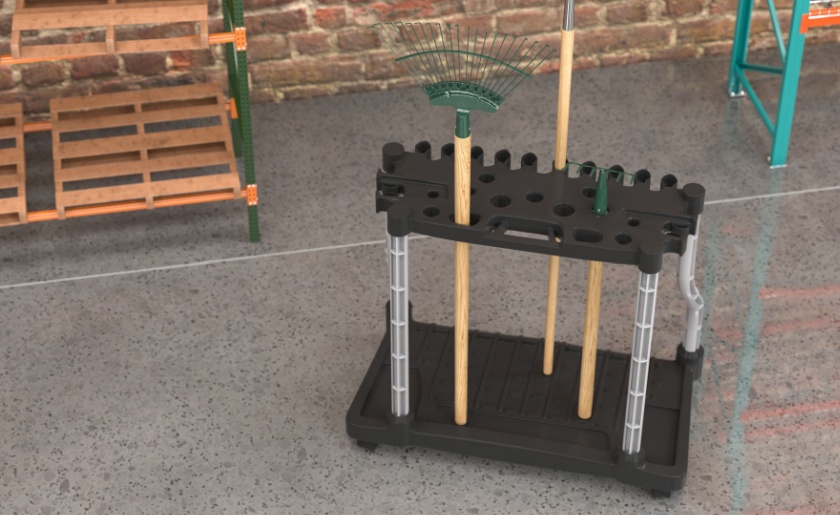
If you are comfortable with basic screws, you can upgrade to a simple rack: Screw a ready made long tool holder or a sturdy rail with hooks to the wall, then hang each tool so the head rests near the floor and the handle leans back against the wall. This keeps tools upright, off the door, and lets you grab one without knocking the rest over. Should you prefer something more mobile, you can simply invest in a portable long tool holder, like the one pictured below.
When you’re getting ready for the warm season, these same tricks make it easy to organize lawn tools for summer(opens in new tab) so rakes, trimmers, and hoses are all ready to go instead of buried in a corner.
5. Separate everyday tools from deep storage
The easiest garden tool storage trick for beginners is to split tools into “everyday” and “everything else.” Everyday tools go in a grab and go container: a sturdy bucket, tote, or basket that always holds your favorite trowel, hand fork, pruners, gloves, ties, and a marker. The rest can live in a larger bin or on a shelf.
With that split, short gardening sessions become as simple as picking up your “go kit” and walking outside. The bin with extras can stay on a high shelf at home, in a garden storage cabinet, or even in a self storage unit if you only need those items a few times a year. Before anything goes into deeper storage, give tools a quick clean and let them dry fully so wood handles and metal parts don’t rust or grow mold.
6. Build a seed and small parts library
Small pieces are the first to get lost, so they need their own tiny “library.” Seed packets, hose washers, drip irrigation bits, plant labels, and nozzles all do well in a divided case. A tackle box, craft organizer, or over the door shoe organizer all work, just give each small pocket or section one job: spring seeds, summer seeds, fittings, labels, and so on.
Keep this small organizer somewhere you can see and reach easily: on a middle shelf near your potting area, or hanging on the inside of a shed or cabinet door. If you store it in a hotter space (like a metal shed or unit), choose opaque or solid containers to protect seeds and plastics from light and big temperature swings.
Once your seeds and small parts are under control, you can try growing inside as well: learn these tips and tricks for starting an indoor garden(opens in new tab) to turn a few pots and a sunny window into a simple indoor setup.
7. Create one focused watering station
If you want to avoid getting water into places it shouldn’t, you’d better have plan for your watering gear. Choose a comfortable spot near a tap and add a hose reel or hanger at a height between your knee and shoulder. Under it, place a narrow bin or basket for nozzles, sprinklers, hose washers, and quick connect pieces. Hang watering cans and spray bottles on a hook or sit them on a small nearby shelf.
At the end of the season, you can coil hoses, empty sprayers, and move the key pieces to a small storage unit or a weather tight outdoor cabinet in one trip, where they stay protected until spring. Always disconnect hoses and let everything drain and dry before storing to prevent mold, rust, and freezing damage.
8. Set up a compact potting station
A potting station sounds fancy, but it can be very simple. You need three things: A waist high surface you like working on (an old table or shelf), a shallow box or drawer for hand tools and gloves, and a deeper bin under the table for potting mix. Keep one crate or box nearby for pots and trays, sorted roughly by size. Placed against a wall near light and water, this station turns repotting and seed starting into an easy routine instead of a hunt for supplies.
Once your potting area is set up, you can have fun with containers: these creative DIY planters(opens in new tab) will help you revamp a small balcony or urban garden on a budget without adding clutter.
9. Use overhead and high wall space wisely
The upper part of a shed or garage is great for light, bulky items that get in the way on the floor. Simple ceiling hooks or rails can hold items like lightweight ladders, folded trellises, or empty hanging baskets.
Plus, you can also use a light shelf up high to store tomato cages, plant supports, and spare pots. To keep things safe and simple, store sharp or heavy cutting tools (big pruners, saws) at eye or chest level on solid hooks or a rack instead of overhead. This way, there is less risk if something slips.
10. Get a garden friendly storage cabinet you can keep on site
If you want some of that organized feeling right in your garden or on a patio, a tall outdoor storage cabinet or small vertical shed is a great “mini unit.” Whether tall or short, these narrow cabinets (resin, metal, or wood) fit along a fence or balcony wall and can hold a surprising number of tools: long handled tools on one side, shelves for bins and a seed library on the other, and hooks on the doors for gloves and hand tools.
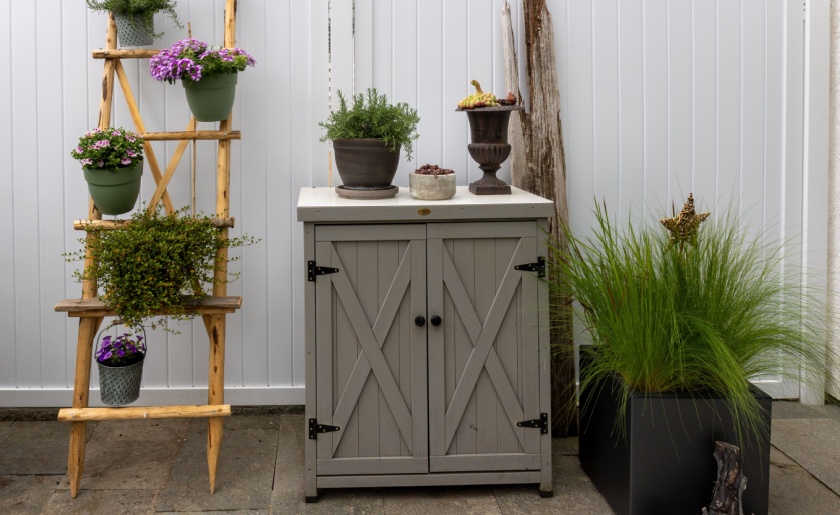
Because they’re weather resistant and often lockable, they act like a personal storage unit just outside your door. You can copy the same zones you use elsewhere: watering gear on the bottom shelf, everyday tools at arm height, lighter bulky items up top. That way, your routine feels simple whether you’re stepping into the yard or out to a larger unit.
Once your tools and supplies are under control, your next project might be on the “nice‑to‑have” list, like DIY backyard water features that turn an organized yard into a space you actually want to linger in.
11. Coordinate home and self storage seasonally
If your business involves self storage for overflow, treat it as the off season half of your garden tool storage, not your main shed. Use your home shed, garage, or yard cabinet for the tools and materials you touch every week, and let the unit handle what you only need by season: spare pots, extra bags of soil, bulky decor, and larger machines you can park for a few months.
You might also turn to self storage if you live in a small city apartment but still grow things in a shared courtyard or community garden. In that case, a 5’x5’ storage unit(opens in new tab) qua “garden locker” near home can hold your bags of soil, extra containers, and a simple hand tool kit so you’re not filling up your hallway closet or balcony.
If your hobby grows to include a fold up cart, larger planters, or a small electric mower for common areas, stepping up to a 5’x10’(opens in new tab) gives you room for a clear aisle, a shelf for bins, and a vertical rack for long tools while keeping your living space light and uncluttered.
Bottom line
When you keep similar tools together, hang what you can on the wall, and give long handled tools a clear parking spot, garden tool storage stops feeling like a puzzle and starts working on autopilot. Add one grab and go kit, a small seed and parts organizer, and simple labels, and you can use a shed, cabinet, or small storage unit without losing track of anything you own. All that’s left to do is to create that enviable backyard of your dreams.
Garden tool storage FAQ
Can I store fuel, pesticides, or fertilizers in a storage unit?
Often, no. Many facilities restrict gasoline, fuel filled machines, and certain chemicals, and heat can make leaks or fumes worse. Always check your rental agreement and local rules, and when in doubt, keep fuel and strong pesticides in a properly ventilated, code compliant space at home instead of in a unit.
How do I prevent my garden tools from rusting in storage?
Clean off soil and sap, let tools dry completely, and store them in a dry spot with some air circulation. For longer term storage, especially in a unit, you can lightly oil metal surfaces and avoid leaving anything in damp soil or wet totes.
What’s the best way to store long handled tools safely?
Use a simple vertical rack, corner “parking spot,” or wall hooks that keep each handle in its own place so tools don’t slide or cross. Try to park them between floor and shoulder height, with sharp edges turned toward the wall, so nothing falls onto feet.
What’s a good “mini storage unit” for a small garden or balcony?
A tall, narrow outdoor storage cabinet or vertical mini shed works well. Look for a weather resistant, lockable unit with space for at least one row of long tools, a couple of shelves for bins and a seed library, and hooks on the inside of the doors for gloves and hand tools.



Storage Ideas for Small Spaces: 9 Ways to Max Out Your Home
A messy home contains the seeds of its organization. Those seeds everywhere: the space above doors, under beds, behind sofas and inside furniture can all become storage. Here are the best storage ideas for small spaces, so you can make the most of your cozy home.
How to Organize Your Bathroom: 8 Ways to Stay Tidy
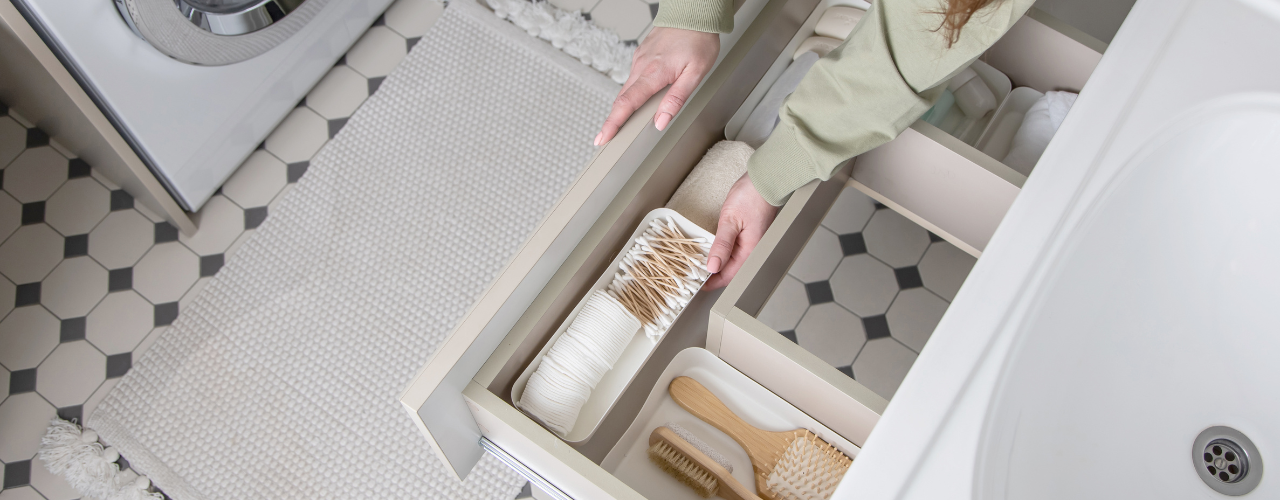
You already know why an organized bathroom is worth the effort, but let us remind you: it makes rushed mornings easier, keeps counters cleaner and just helps get you in the mood to go through your skincare routine like you should. Plus, in bigger households, it helps everyone find what they need. And you know how much a tidy bathroom counts for your self-esteem when a guest or a partner shows up. Luckily, you don’t need a degree to know how to organize your bathroom. The secret is keeping less, giving every item a home and making that home simple to use. Let’s go through some practical steps can help you create a bathroom that stays functional and nice to look at.

Best U.S. Cities to Live Uncluttered: Plano, TX, Offers the Most Room to Breathe
Clutter is in our homes as much as in our heads. Both are shaped by where we live.

How to Use Silica Gel Packets for Storage
Moisture can cause significant damage to items in storage, leading to rust on tools, mold on clothing and warping in documents. Silica gel uses science to fix that. Often found in small packets inside product packaging, silica gel is a desiccant that absorbs moisture from the air, keeping your stored items dry and protected. This guide explains what silica gel is, how it works and how you can use it to preserve your belongings in self storage.

Where to Find Moving Boxes in Los Angeles
Moving in Los Angeles is its own thing, and figuring out where to get moving boxes sorted is just the start of everything you’ll need to organize before moving day.

10 Best Places to Donate Books in Philadelphia
Did you know Philadelphia’s book-sharing roots go back to 1731? Benjamin Franklin and The Junto Club gathered their personal collections into a shared library, thus sparking a tradition of pooling knowledge for the common good. Today, you can carry on that spirit by donating books to local organizations and free libraries.

How to Sell Furniture (For Quick Deals and Side-Hustles)
Selling used furniture can be quick, profitable and even rewarding if you know where to list, how to present your pieces and what buyers are looking for. Just a tiny bit of patience and some good planning will take you a long way. This guide covers everything you need to sell your furniture efficiently and safely, for the best possible price.

1 in 4 Americans Rent Self Storage — and the Next Wave Is Already Coming
About one in four Americans is already using self storage and just as many are actively searching for a unit online right now. Across the 150 largest U.S. cities, self storage searches rose 23% year-over-year in 2025 — nearly triple the growth recorded the previous year, up from around 8% in 2024.

Where to Donate Furniture in Philadelphia
Philadelphia has a strong tradition of giving back, and donating furniture is a practical way to support local charities while freeing up space in your home. Whether you’re downsizing, moving, or just decluttering, there are plenty of organizations ready to take your gently used furniture. And if you’re not ready to part with certain pieces just yet, self-storage can buy you time to decide.